Benefits of Elevated Gardening Beds and How to Build Your Own

Getting the urge to try out your green thumb? Elevated or raised bed gardens are one of the most convenient and attractive ways to add vegetables or flowers to your yard. While many people find the process of making a raised bed intimidating, there is little to worry about. A raised bed can come together in an afternoon with the right materials.

Reasons to Choose Raised Beds

Raised beds have several advantages over ground-level planting. They offer better drainage, which can prevent root rot. Raised beds make it easy to improve your soil to raise fuller, more vibrant plants. They are also easier to work with because you do not have to bed as far in order to use them.

When you start a raised bed with fresh soil, you can avoid many of the weeds that can be a problem when using the topsoil already in your yard. This means less time weeding and less competition for the plants you want to grow.

A raised bed garden is also aesthetically pleasing. Create multiple beds with paths between to add a calming garden oasis to your yard.

How to Build a Raised Bed Garden

Putting in elevated beds is far easier than it looks. Choose the wood for your border and decide how tall you want your beds to be. Depending on your carpentry skills, you can either build the entire bed yourself or buy premade corner brackets. 

Best Wood Choice for Elevated Beds

Many people recommend cedar because this wood is naturally rot-resistant. However, juniper and redwood are also good choices. Choosing rot-resistant woods will ensure that your beds last longer. Many well-constructed beds can last 15 years or more. Our treated MicroPro lumber is also a safe alternative for raised garden beds.

Setting Dimensions for a Raised Bed

How tall the bed should be depending on the soil beneath. If you have good soil that roots can penetrate, a bed that is only six inches high can be sufficient. The most common bed height is 11 inches, which can be accomplished by stacking two six-inch boards. The maximum height for a raised bed is about 36 inches.

Whatever height you choose, remember that you have to add soil to fill it. Additionally, taller beds will need more support than shorter ones because of the weight and pressure of the soil. 

Beds should be no more than four feet wide. This allows you to reach the center of the bed without stepping on and compressing your soil. The bed can be as long as you wish. Just be sure to add cross supports every four to six feet.

Choosing Soil for a Raised Bed

You can use the topsoil from your yard; however, adding soil to a raised bed is an opportunity to choose rich, weed-free soil with improved drainage.

Many people start their first garden with purchased soil. A mix of 1/3 peat moss, 1/3 vermiculite and 1/3 compost offers both drainage and nutrition for plants. If you have a supply of compost at home, you can also make a homemade soil with half compost and half topsoil.


For building supplies and more information on your next home improvement project, stop on in our store or give our team at Nuzum Building Supplies a call! 


Benefits of Installing a Ceiling Fan

When the summer months come knocking at our doors, it’s quite difficult to stay cool and refreshed. It’s even more difficult to stay inside our house because the air is all hot and humid. At the end of the day, we’ll be sweating profusely and truly exhausted from all the heat.

Luckily, there are a lot of ways to make our rooms breezy during the sweltering season. One perfect method is to install a ceiling fan.

What Is a Ceiling Fan?

As the name suggests, a ceiling fan is a fan that is suspended from the ceiling of a room or space. It has hub-mounted rotating blades that help circulate air, thus producing a cooling effect in the nearby area.

What Makes A Ceiling Fan Beneficial?

·       Ceiling Fans Are Also Great for Cold Weather

Most people simply associate ceiling fans as devices to cool down a room. But in reality, ceiling fans are a lot more flexible than that — because they can actually bring warmth to a space as well.

This is because ceiling fans have two settings that dictate the direction of the blades. You can create either a downdraft or an updraft. With the downdraft, the air is blown downwards, thus cooling the area beneath. Meanwhile, the updraft setting draws the cooler air upward so that the warmer air near the ceiling is the one that’s circulated below.

In other words, the ceiling fan is a versatile device because you can use it both during the summer and winter.

·       Ceiling Fans Help Get Rid of Insects and Pests

Summer isn’t just the season for heat and humidity — it’s also the season of bugs, insects, and pests invading our houses. Luckily, if you have a ceiling fan, it’s easier to get rid of them. This is because the breeze works against them, so they’re practically blown away by the airflow produced by the fan.

As a result, not only will a ceiling fan refresh you, but it will also guard you against bothersome insects.

·       Ceiling Fans Can Also Provide Light and Beauty

Over the years, ceiling fan manufacturers have added more functionalities and designs to the products. As a result, the ceiling fans we can find nowadays already come with an extra lighting feature, as well as a stunning design.

This makes ceiling fans a great addition to any room. It will help cool or warm the place, and at the same time, it brightens the place and looks great in the view.


Ceiling fans are a lot more flexible and versatile than we actually think. They can cool down a room or warm it, and they also have a light feature and beautiful design.

Because of this, it’s a great idea to have a ceiling fan in at least one room of your house. Give our team a call at Nuzum Building Supply for everything you need for your project.

7 Best Gift Ideas for a DIY Lover

If you have a loved one in your life that loves DIY projects, you may be wondering what to buy for them. We’ve compiled a list of seven great gift ideas for DIYers of every skill level.

  1.     Magnetic Pickup Tool

No matter what the task is, dropping metal pieces like nails and screws happens to everyone. And of course, these objects seem to find their way to the most inaccessible places in your shop. An extendable magnetic wand is a perfect tool for anyone who has had to crawl on the floor to retrieve a missing screw from under the workbench.

  1.     Digital Multimeter

No Electrical tool kit is complete without a multimeter. Today’s digital models are rugged, easy to use, even with gloves on, and sport extra-large displays. It’s also an excellent tool to help young or inexperienced DIYers learn more about electrical currents and how they work.

  1.     Storage Organizer

It doesn’t take long for a DIYer to gather a collection of nuts, bolts, washers, and screws left over from older projects. Keeping them safe and organized is always a challenge. Storage organizers come in a range of shapes and sizes, so there’s a perfect solution for every workspace.

  1.     Drill Attachments

Every drill comes with a basic set of drill bits. However, the average DIY enthusiast will quickly find that the included bits are made of cheap metal and break. Sometimes, they don’t come in the right sizes and types. An aftermarket attachment set offers a wide range of bits and attachments, including everything from screwdriver bits to hole saws.

  1.     Laser Level

Every DIYer probably has a level already. Upgrading to a laser level is a great way to help them up their game. They can use it to hang pictures, install shelving, lay floors, hang wallpaper, and more.

  1.     Work Gloves

A good pair of gloves is an essential tool for a DIYer. Whether they are working under the hood, on the roof, or in the garden, Look for gloves that offer extra protection for the thumb and index fingers. Machine washable gloves are a plus.

  1.     Gift Card

If you don’t know what to buy, a gift card, so your DIYer get what they want. Just choose a store or website where they enjoy shopping.

DIYers come in every kind. There’s almost no limit to the projects they might take on. With the right tools, you can help them stay busy!

3 DIY Kitchen Cabinet Ideas Anyone Can Build

It’s a Great Time for a Do-It-Yourselfer

The access to Internet makes it easier than ever before to find ideas, inspiration, and instructions for an enormous variety of DIY projects. However, not every project you see online is quite as easy as it looks. Many of the supposedly DIY projects you may find were actually done by accomplished craftsmen and designers.

There is good news, though. Many projects are simple enough for nearly anyone to do, even with limited skills and tools.


Here are 3 DIY cabinet ideas that anyone can build:


  • Disappearing Dishwasher

Many dishwashers are available in “panel-ready” versions. The dishwashers that also known as concealed or integrated dishwashers are designed to accept a panel that matches the existing cabinets in your kitchen. A simple panel can transform your dishwasher from an unattractive eyesore into just another lower cabinet. This can give your kitchen a seamless look typically found in a high-end home.

You can buy custom cabinet panels online or make your own. Either way, it doesn’t take much time or money to transform your kitchen with this simple upgrade.


  • Chicken Wire Doors

Open cabinets are a restaurant kitchen staple. In the home kitchen, however, most people don’t want their cabinets exposed like that. Replacing your cabinet doors with chicken wire is an easy way to add some country appeal to your kitchen.

You can complete this easy project in an afternoon, but the impact is much more significant than the effort. If you want a vintage look with just a touch of the whimsical for your kitchen, DIY chicken wire cabinet doors could be just what you’ve been looking for.


  • Under Cabinet Lighting

Too many kitchens, especially in older homes, suffer from a lack of adequate task lighting. Today, it’s easier than ever to transform a dark, shadowy kitchen into an inspiring space. This transformation is easy with DIY under cabinet lighting.

Kitchen under cabinet lighting is an easy project that any DIY’er can take on. If you opt for battery-powered LED lights,

Battery-powered LED lights, you can complete the task in about five minutes, with no wiring required. If you prefer a slightly more permanent installation, you can drill a few holes and route a power cord. You can often find an extra outlet in an upper cabinet behind the microwave.


Call the Professionals at Nuzum

While many kitchen upgrades are best left to professionals, just about anyone who can hold a screwdriver can handle these simple DIY cabinet projects. Get all of your necessary tools, building supplies and professional advice here at Nuzum!

Home Improvement Projects for Beginners

Jump in, get your hands dirty and have some fun with easy home improvement projects. We all start somewhere. You are never too old or too young to learn simple projects to better your home. Whether it is an upgrade or a fix, improving your home is always a good idea! Use your free time and these easy tips to build your skills and boost your confidence when it comes to home improvement!


Paint a room

If you want a fast and economical way to achieve impressive and immediate change to your room’s look and feel, a new coat of paint is your best friend. Whether you are freshening up a guest room or touching up a dry wall patch, painting is the final touch that makes your room feel complete. If you don’t like the finished project, no worries, just paint over it until you find what you like. Many paint stores will give you a sample can of paint to use on a portion of your project to make sure you get the right color on the first coat. Invest in a roller and pan, trim brush and clean up equipment to make the process go much smoother. While it can get messy, painting a room is something the whole family can enjoy doing together!


Install a fire pit

Create your family’s favorite outdoor gathering spot perfect for bonfires and smores by building a fire pit. This introduction to basic concrete work is the perfect project to really bring out your building skills. Evolve your skills into patio, tuck pointing, retaining walls and lots of other DIY home improvement projects! Masonry tools are inexpensive and easy to obtain. Use a trowel and tuck-pointer to make your fire pit and any future project easier and faster to complete.


Replacing cabinet pulls or knobs

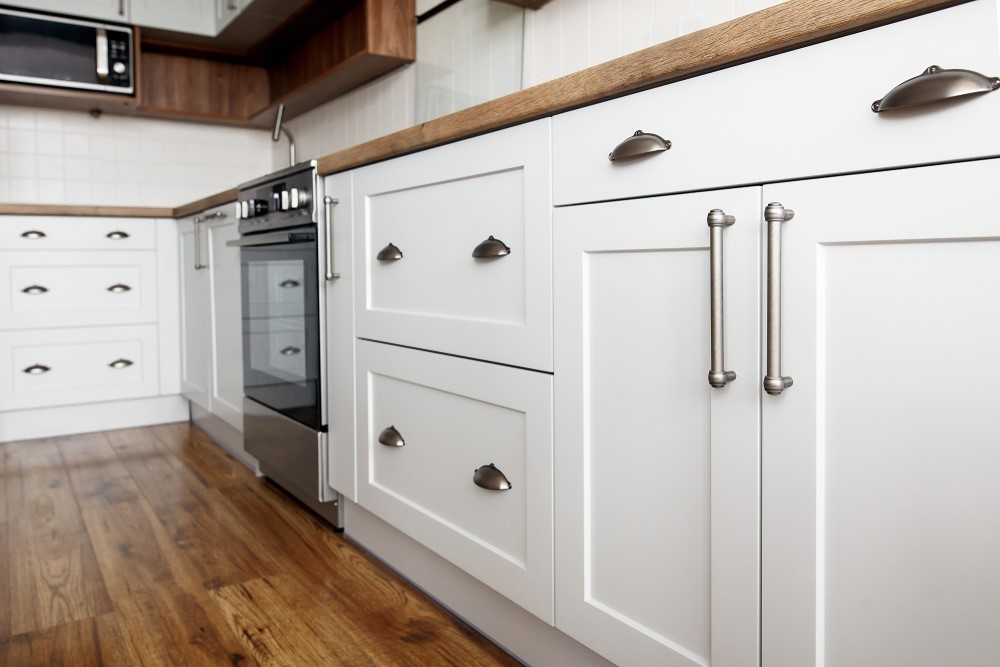
Upgrading your cabinets and replacing the pulls or knobs is a quick and easy way to improve your kitchen without breaking the bank. It can be as easy as unscrewing the old and attaching the new piece. Don’t underestimate the look of new hardware on your cabinets and drawers. You can tie the entire kitchen or room together with knobs and pulls that match your style. Some complications can arise when using washers or a pull that is rusted onto a screw. It is very difficult to unscrew them with just a screwdriver; you need a power tool. Having a cordless drill is an essential tool for your DIY toolkit! Replacing your cabinet knobs and pulls to match the rest of the room will really complete your space.


Replacing a torn window screen

Whether it happened from a fallen branch, a pair of eager paws, or just simple wear and tear, most window screens are easy to fix. Repair the patch or replace the whole screen to prevent insects from entering your home and making your windows look more attractive. Window materials are inexpensive. A roll of screening and rubber spline to hold the screen in place are easy to find in your local home improvement store. Use a spline roller to make the project go smoother and decrease the risk of damage from installation!